In the BDSM world, B mean Bondage, and tying up or being tied up is a source of games or punishment, as an activity in itself or, often, in addition to other activities... especially in games or relationships of domination and submission. But I don't think you really want to hear me theorizing about the different reasons for wanting to tie up or for loving being tied up?
I can plan, in the future, to develop my motivations and personal feelings on this point if you think it's interesting, but in this article I just want to be much more practical than theoretical.
So... bondage, how to ?
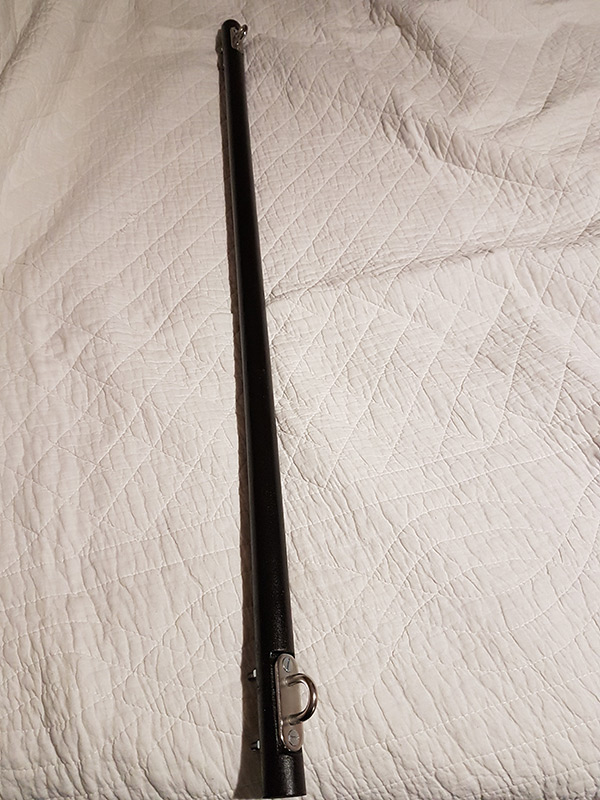
Ropes, handcuffs, chains, Saint Andrew's cross, straitjacket ... there is no shortage of tools and ideas, either in shops and specialized sites, at home or in DIY stores! It is this last point that interests us today, through the realization of spreader bars, that I have just tried.
What is a spreader bar?
We can find this definition on
Wikipedia :
"A spreader bar is an article of bondage equipment consisting of a metal or wooden bar, with attachment points for bondage cuffs at each end, which can be fastened to wrists, ankles or knees to hold them apart."
So, it's quite effective for strongly constraining movements and maintaining a submissive in a certain position!
Where can I get spreader bars?
Everywhere on sites specialized in BDSM accessories, with a lot of difference in terms of price, quality and finish. You can also make it yourself, quite simply, with a few DIY notions, and it's what I did !
How to make a spreader bar?
I absolutely do not claim to be an expert, this is a first try and it can certainly be improved (advices welcome) but since the first feedback and tests are positive, it made me want to share it.
Required tools :
- A flat file.
- A hacksaw.
- A wood saw.
- Sanding paper.
- A drill.
- A drill bit (for the drill) 0.5cm in diameter.
- A flat wrench, corresponding to the dimension of the nuts.
- A wrench or screwdriver corresponding to the size of the bolts.
Necessary material :
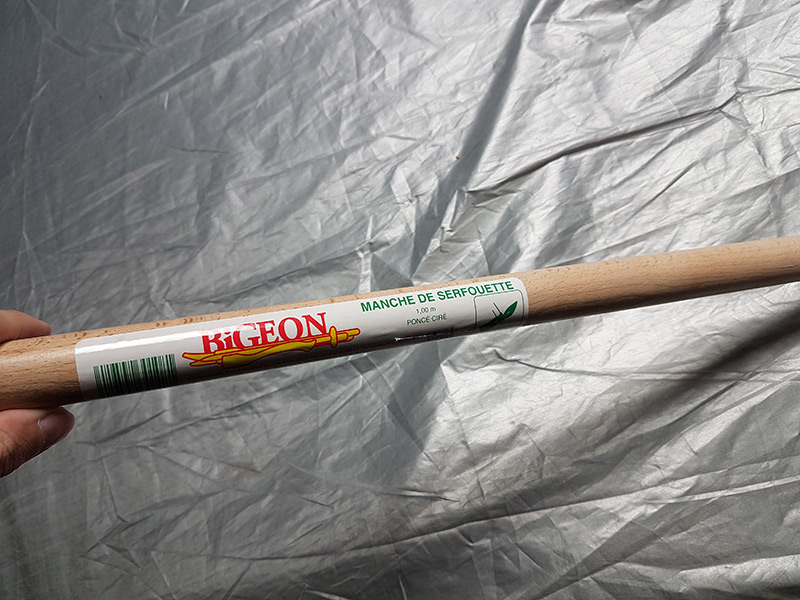
- Shovel handle or other (3.4 x 100cm) 7 €
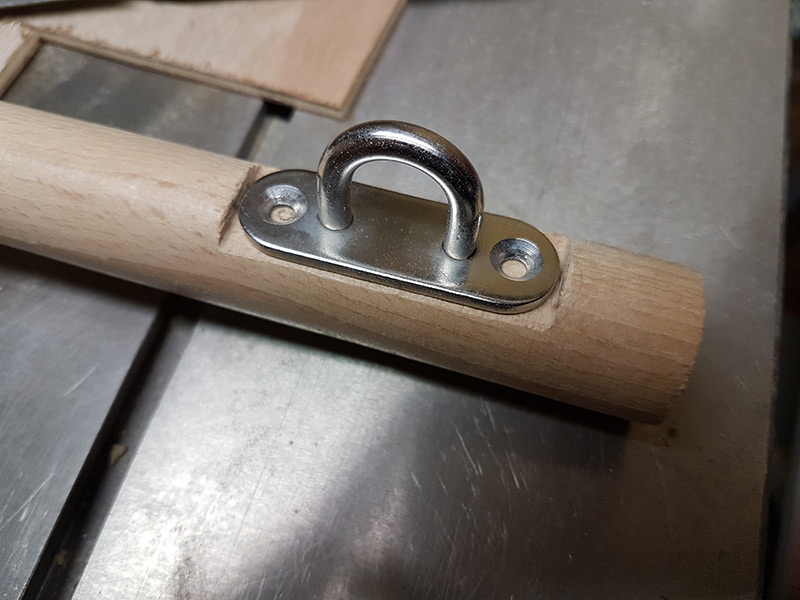
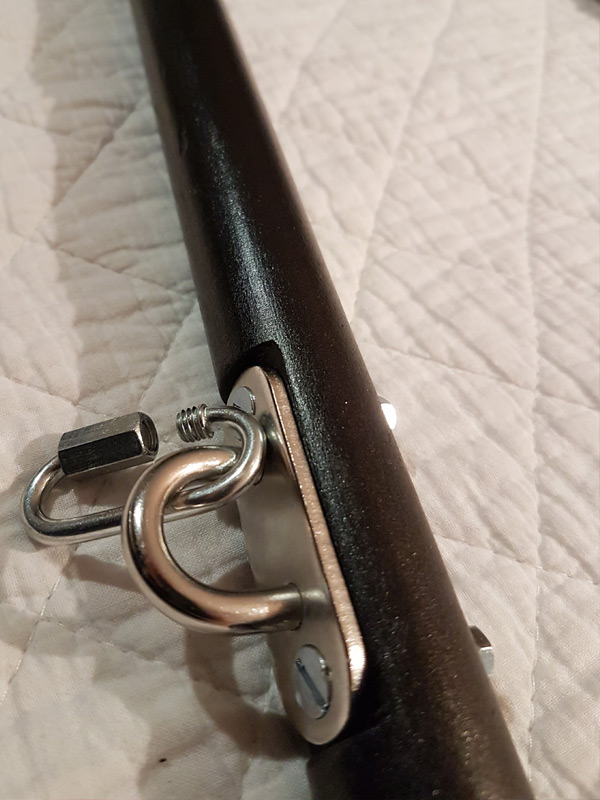
- Two Eye plates (6x2cm) € 6.30
- Screws and bolts (0.5x40cm) 3.5 €
- Paint.
You can find it all at your favorite DIY store. If you already have these tools it is better, otherwise it is usually an investment that will pay off for years to come, if you do a little DIY. Obviously, it is easier if you have access to a garage, workshop, etc. but since there is not a lot of cutting work to do, I think even in an apartment it is possible to do this kind of DIY pretty neatly.
The stages of manufacturing a spreader bar
- Saw the handle to the size you want for the bar, for example 1 meter.
- Position the eye plates 2cm from each end of the handle and mark the position on the handle with a pencil. Make sure the plates are aligned with each other.
- Using the flat file, dig two holes corresponding to the length and width of the eye plates. The plates must be able to be positioned flat, without protruding from one side or the other. File until you get a satisfactory result and a flat surface.
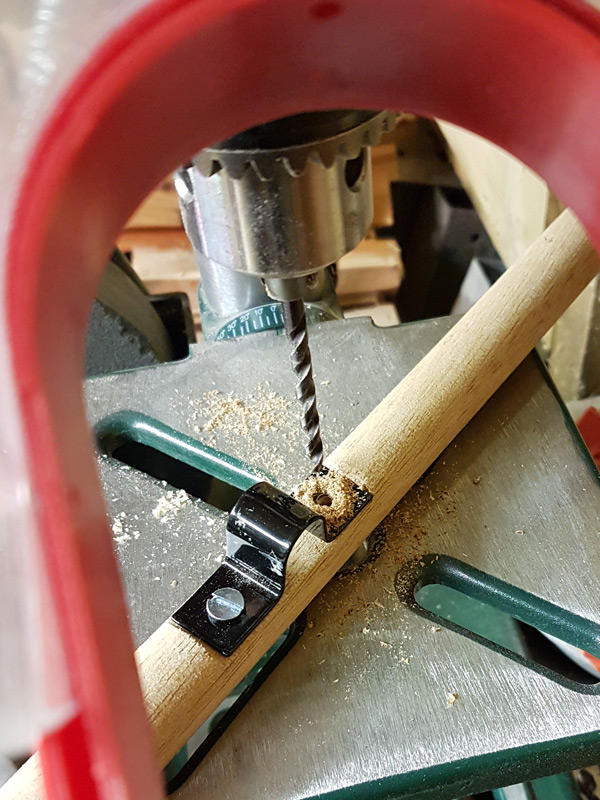
- Position the plate in its location and, using a pencil, mark the position of the first mounting hole.
- Drill the first hole with the drill.
- Position the plate and test the assembly with the bolt and nut in the first hole.
- Then, keeping the plate in place, drill the second mounting hole (By doing this, one hole, then the other, you are sure that they will be in exactly the right place.
- Repeat for the other side.
- Remove the plates and sand the handle with the sandpaper in order to remove all the rough edges and that it is very smooth to the touch.
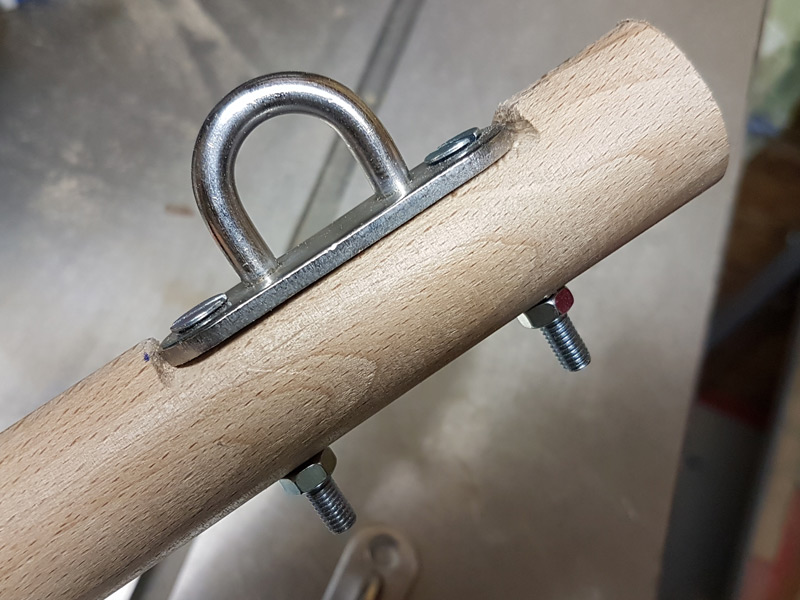
- Secure the plates by adding the washers on the nut side.
- If necessary, saw off the bolts that protrude from the nuts to prevent them from getting caught somewhere and injuring during use.
- Remove the plates to paint the bar.
- Once the paint has dried, bolt the plates permanently, tightening sufficiently.
- All that remains is to test the spreader bar 😊
If you have been attentive, you have seen that in the photos there is a second version of the bar, with different metal fasteners and different positions but the manufacturing principle remains the same. Please feel free to comment if you have any suggestions or questions, especially since I wasn't thinking of writing an article, I didn't take all the pictures :)
And if you like, please support me ;)
1143 
5 comments
Private club 
Join my private club to have access to all photos and videos and be part of my world.
Enter


En effet ;)